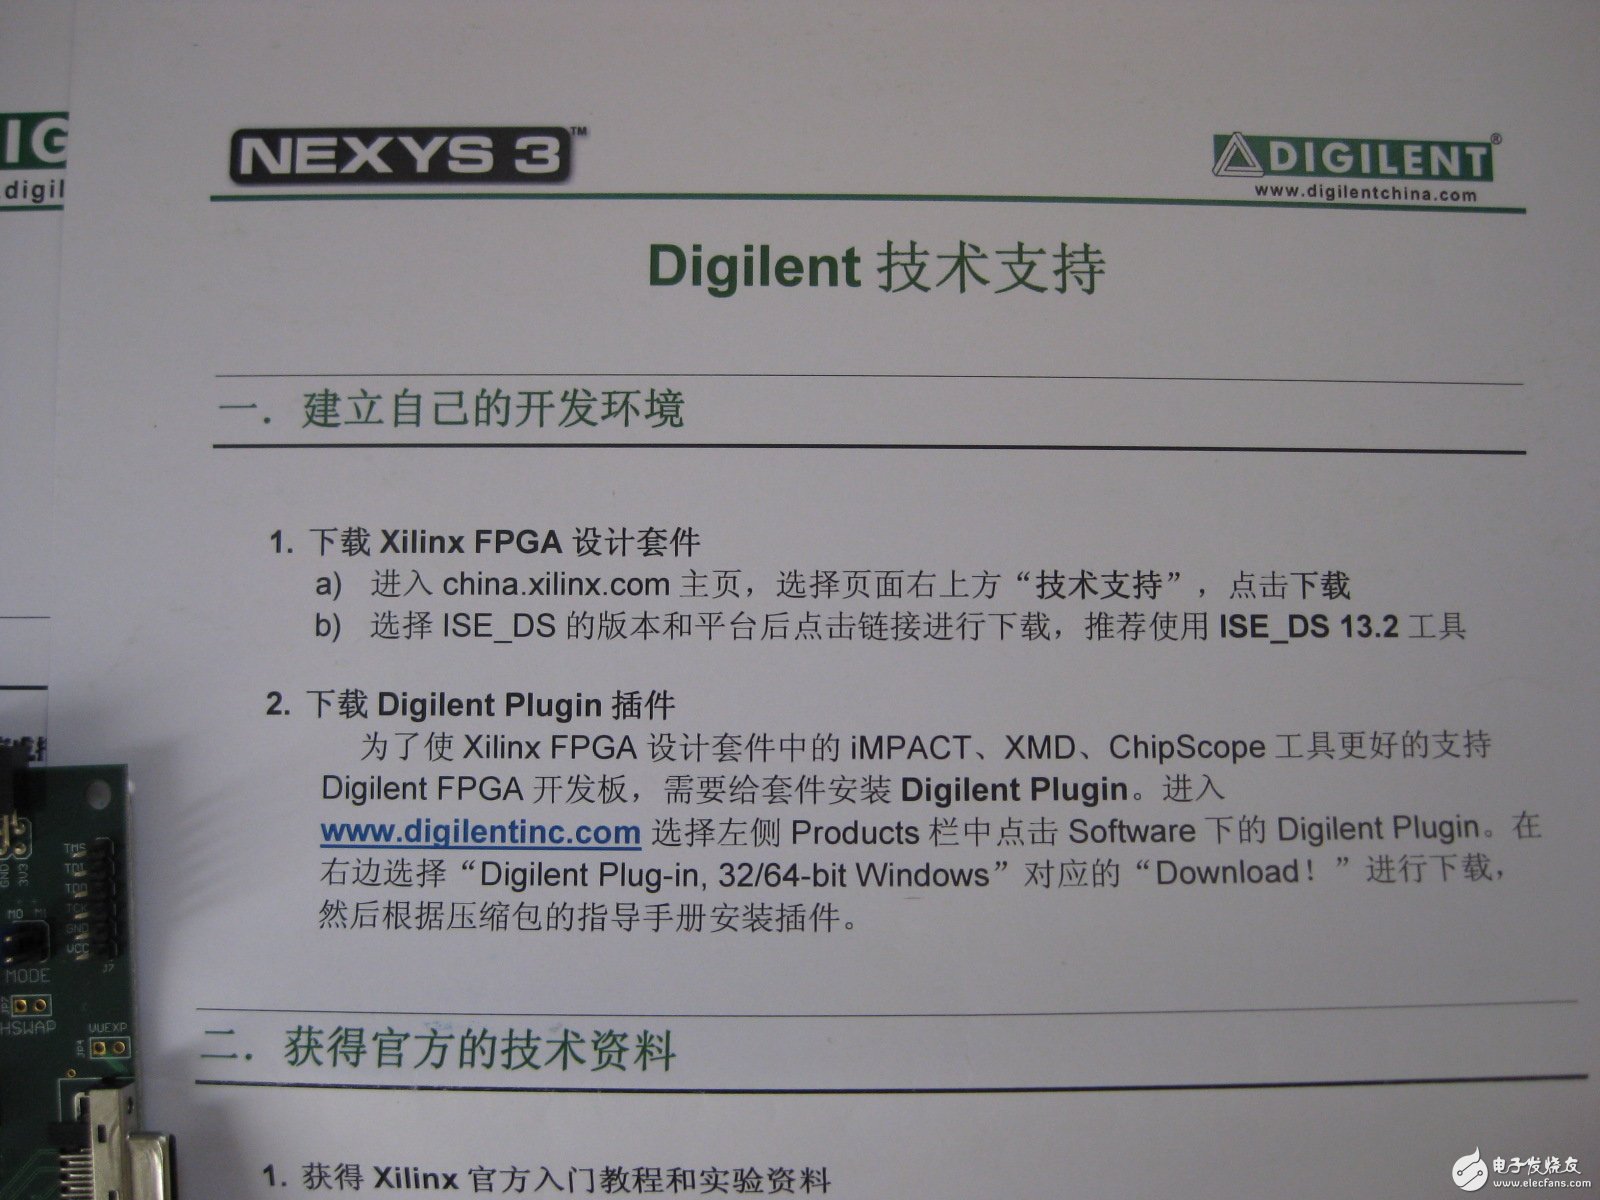
When I took over Nexys3, I thought I could provide a data CD. The result was disappointing. Except for a delicate circuit board in the electrostatic bag, there was only one USB cable and two loose pages for power supply and download. Fortunately, these two loose-leaf pages indicate the basic data request method. As shown in Figure 1, the first thing we need to do is to "build our own development environment". It can be said that "workers must first sharpen their tools when they want to do something good". Sharpening the knife does not mistake the woodworker.
Go to the home page of china.xilinx.com, as shown in Figure 2, select "Technical Support" at the top right of the page, and click "Download".

After selecting the version and platform of ISE_DS and clicking the link to download, it is recommended to use the latest software version ISE_DS 13.3 tool. As shown in Figure 3, a friend using the Windows operating system can click the Full Installer for Windows to download.
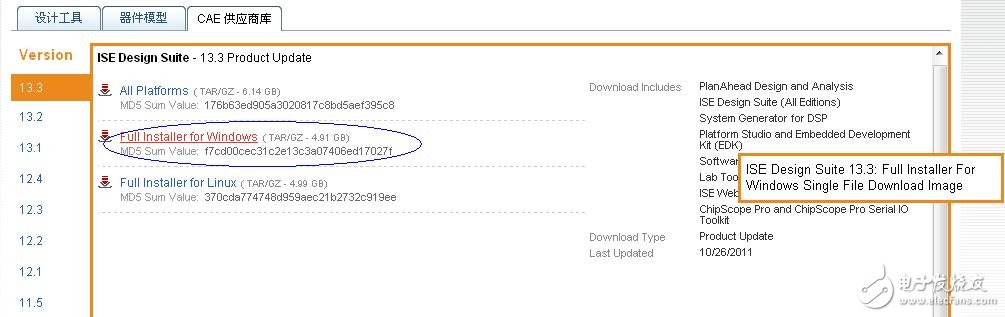
Figure 4 storage download software
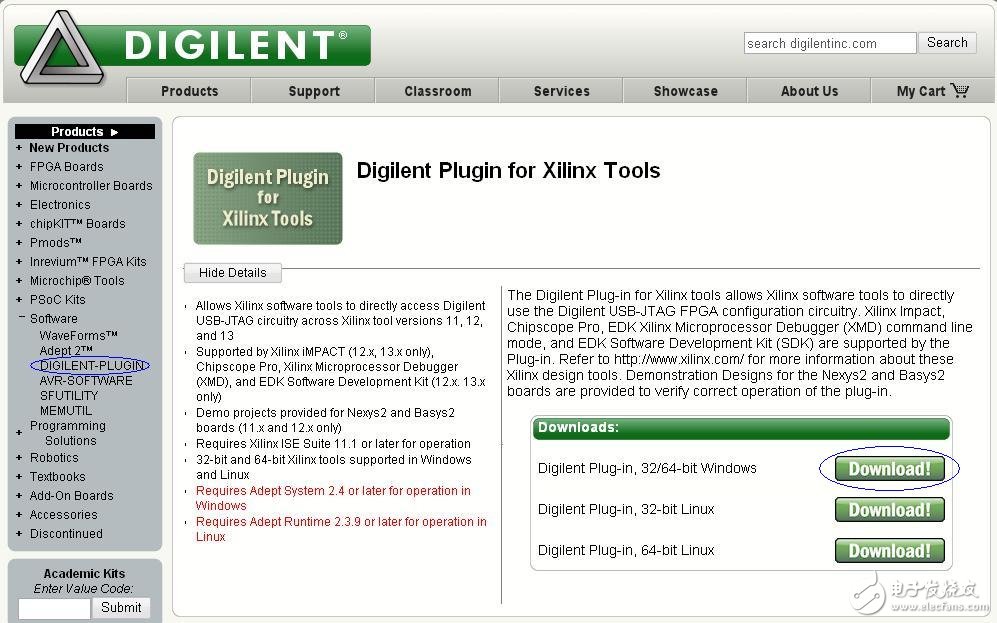
Download the Digilent Plugin plugin
In order for the iMPACT, XMD, and ChipScope tools in the Xilinx FPGA Design Suite to better support the Digilent FPGA development board, the Digilent Plugin needs to be installed on the kit. Go to the Products column on the left and click on the Digilent Plugin under Software. On the right, select "Download!" for "Digilent Plug-in, 32/64-bit Windows" to download, and then install the plug-in according to the instruction manual of the package. The Digilent Plugin plugin download page is shown in Figure 6.
Second, license application and software installation
Software Installation
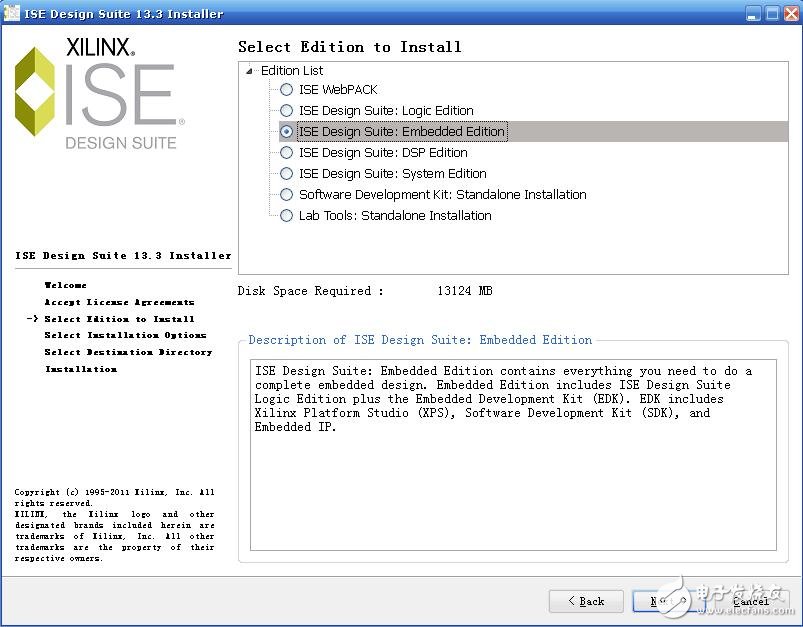
After the software download is complete, unzip Xilinx_ISE_DS_Win_13.3_O.76xd.1.0.rar and click on xsetup.exe to start the software installation. All the way to the next, until Select EdiTIon to Install, select ISE Design Suite: Embedded Editon, as shown in Figure 7.
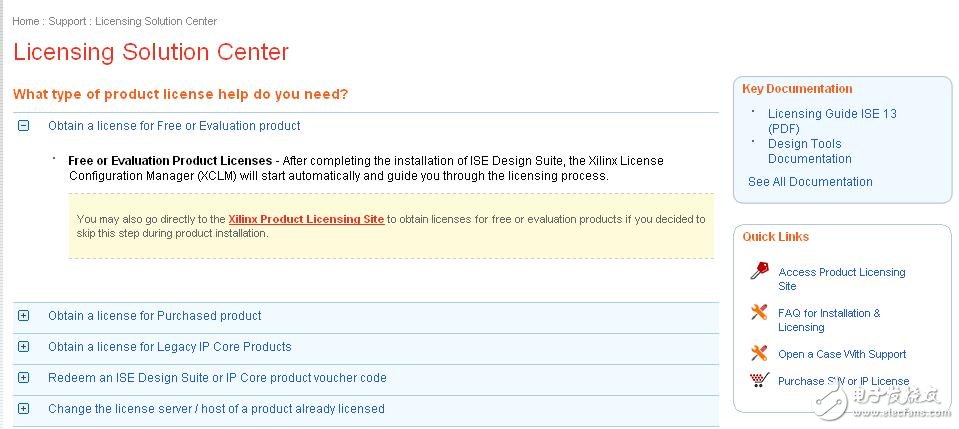
Click on "Technical Support à Licensing Solution Center" at the bottom right of the china.xilinx.com page, and click on "Obtain a license for Free or EvaluaTIon product" under "What type of product license help do you need?" on the new page. The drop-down information shown in Figure 9 pops up, then click on “Xilinx Product Licensing Site†to enter the license management page.
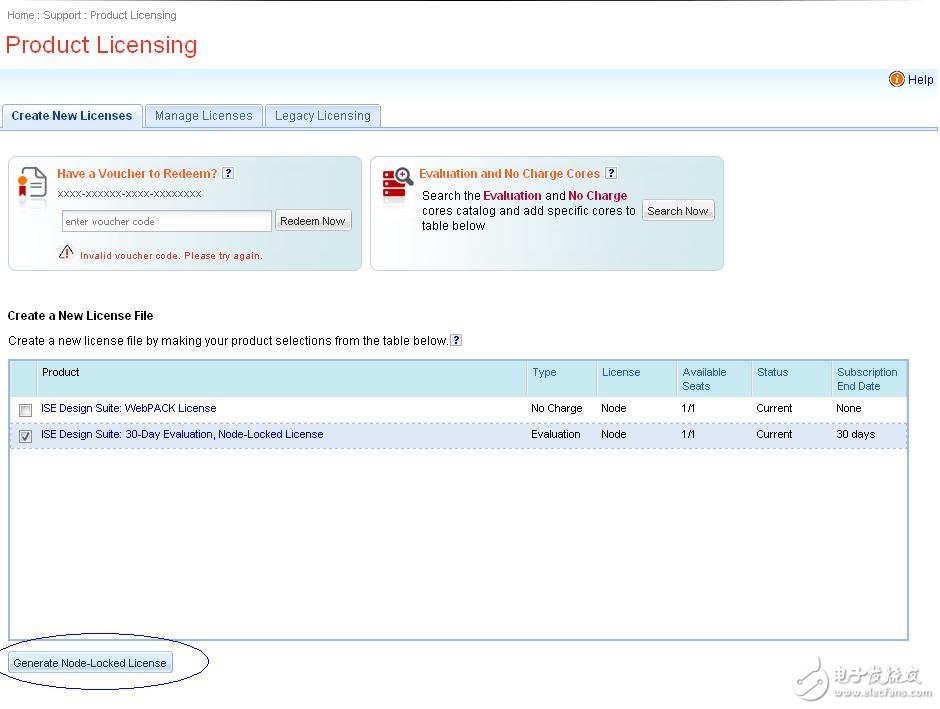
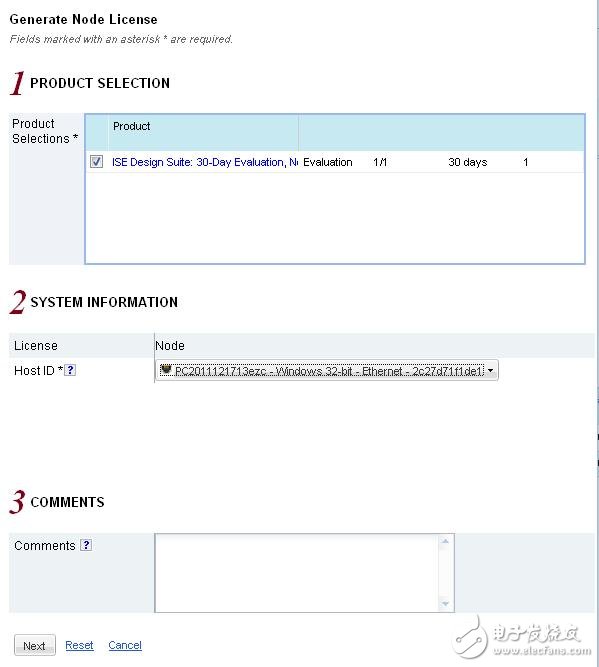
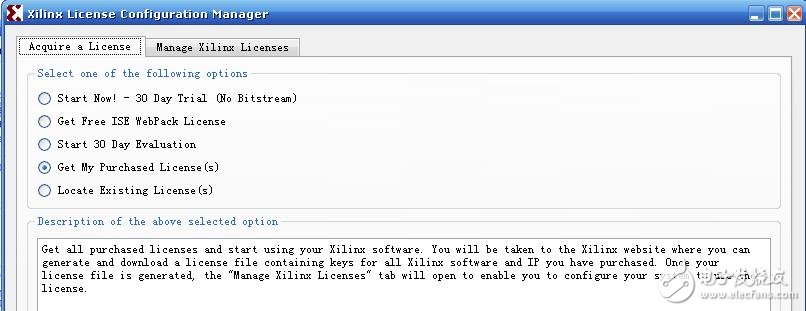
After completing the application and download of the license, we will continue to continue the "business" in the software installation process. In Figure 8, we select “Locate ExisTIng License(s)â€, then click “Copy License...†to locate the license for the new application. At this point, the dialog box "License installation was successful" pops up. Congratulations, the license installation is successful, and your development environment is ready for use. Well, as shown in Figure 12, Xilinx ISE Design Suite 13.3 has appeared in our system menu bar.

Common Uses
AGM has been around since the early 1980s. It was first used for military aircrafts and UPS (uninterrupted power supply) because of its weight, safety and long-lasting power. Presently, AGM batteries are used in powering cars and car accessories such as steering wheels, windshields and heated seats. Racing leagues such as NASCAR choose AGM products because of its resistance to vibration. The Battery also performs well in cold temperatures, which is why AGM batteries are prevalently used for motor homes and robotic applications.
Advantages of AGM Batteries
Low internal resistance
Longer, efficient usage
Ability to survive low temperatures
Spill proof
Responsive to load
Water retention
Faster charging time compared to flooded batteries
Less prone to topping charge, can be stored for a longer time
12V Agm Battery,Best Agm Battery,H6 Agm Battery,H7 Agm Battery
NANTONG RONGCHANG IMPORT&EXPORT CO.,LTD , https://www.ergsolarcn.com