The red rice Note 3 released on November 24th, as the first metal body of Xiaomi, and equipped with a fingerprint recognition function, will eventually bring the thousand yuan machine market into white heat. There were tigers and wolves before and after, and Lei Jun could not help but choke after feeling his years of working life. From "born for a fever" to "all my longings", from pragmatism to retreat, is this the pace of Lei Jun or Xiaomi? Red rice Note 3 is late, is it a big move for MI 5, or is it awkward to keep up with the rhythm of the market? Go into the red rice under the cold shell and see what is still hidden inside us to make us cry.
Out of the box experience: Red rice Note 3 out of the box: all metal plus fingerprint as long as 899
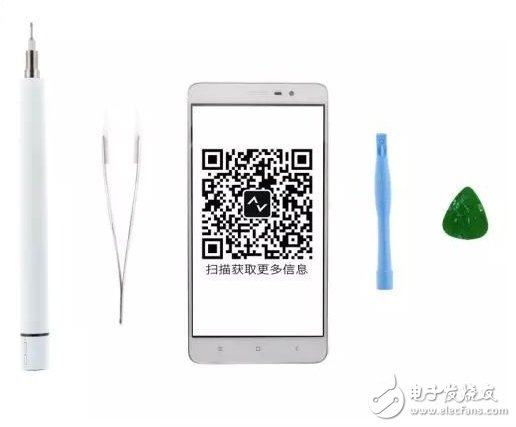
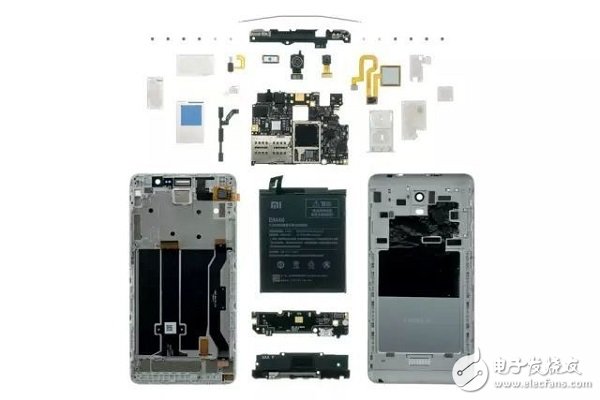
The tools used in this disassemble include "Cross Phillips", "Scorpion", "Crowbar", "Block", "Hot Wind" or "Hair Dryer".
Step 1 Remove the Cato
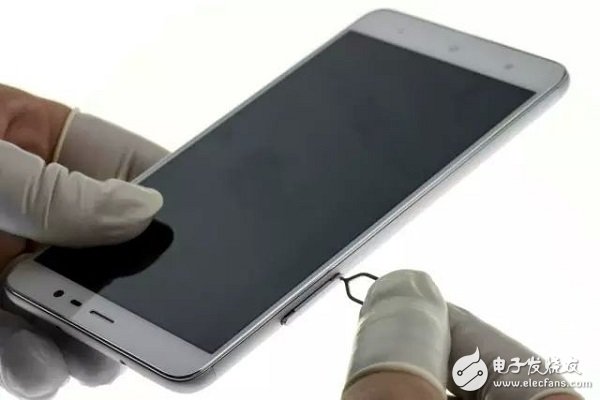
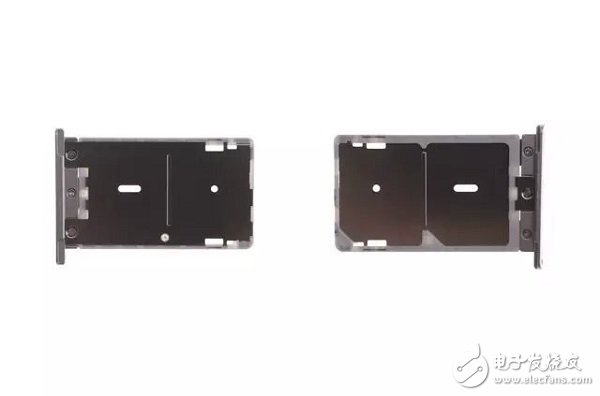
Remove the card tray.
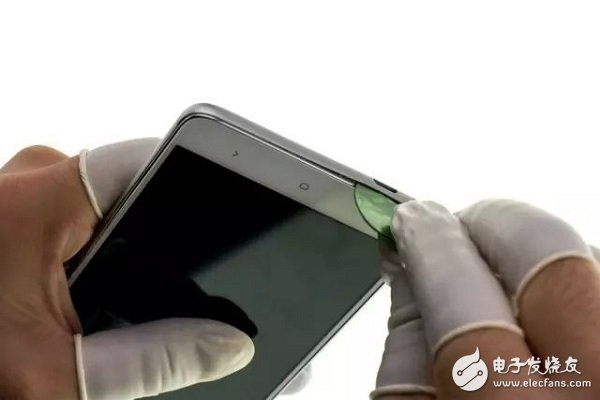
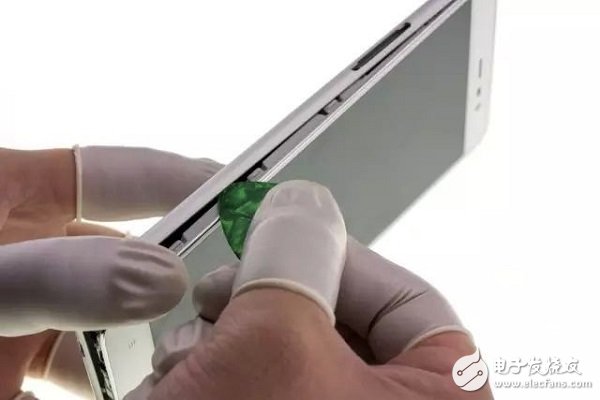
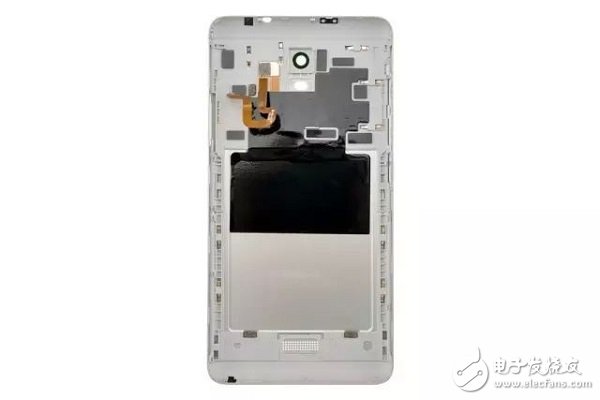
Step 2 Remove the back cover
Use the cymbal to enter from the USB port and open the phone.
The metal body of the Red Rice Note 3 is snap-fitted, and the back cover can be removed without the need for hot air.
After the body is swiped, remove the back cover and remove the back cover.
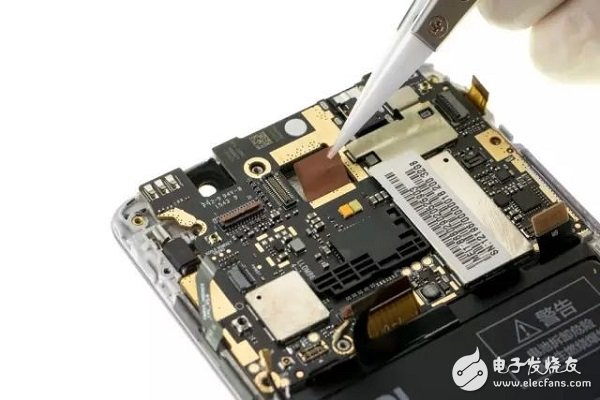
Note that after removing the back cover, do not remove it immediately, and the fingerprint identification module is not disconnected from the motherboard.
Disconnect the fingerprint identification module BTB (Board to Board) and remove the back cover.
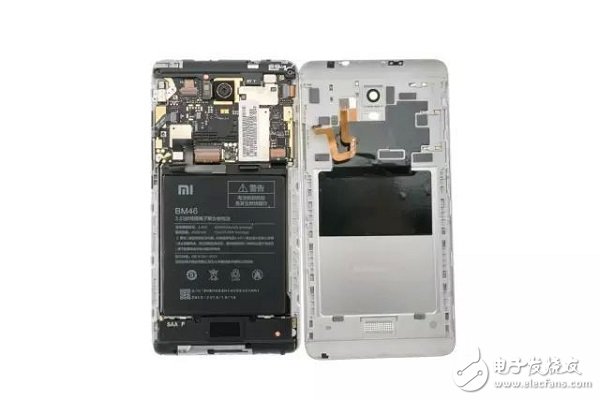
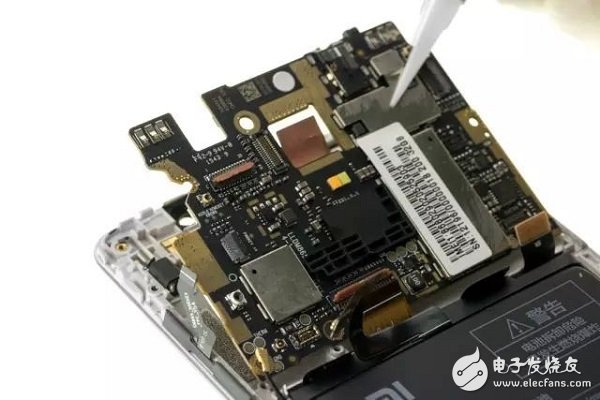
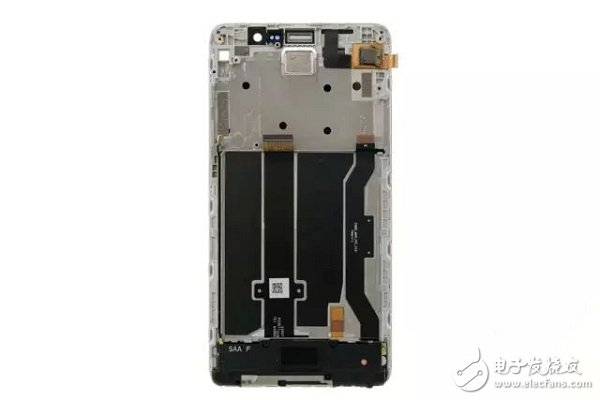
Remove the back cover and you can see that the Red Rice Note 3 has no secondary panel and is also a common broken plate design.
Step 3 Power off the motherboard
Disconnect the battery BTB.
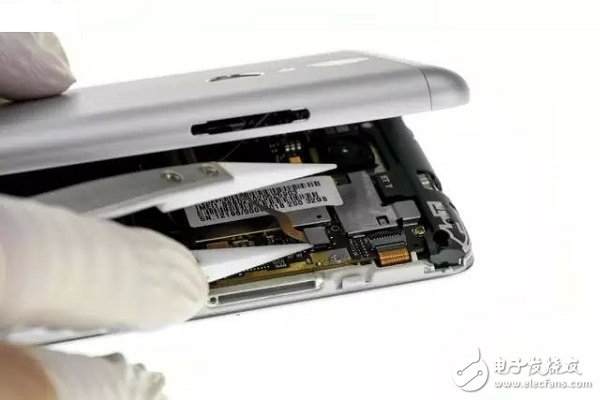
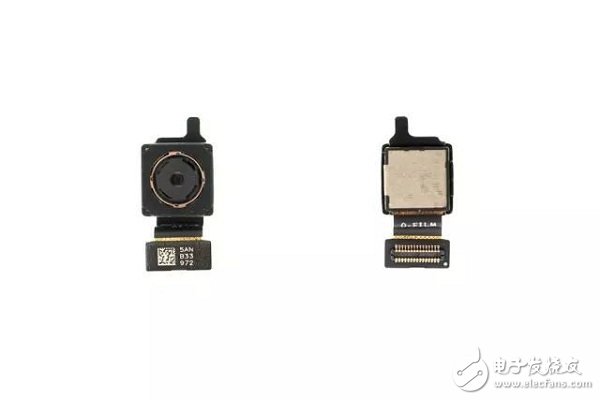
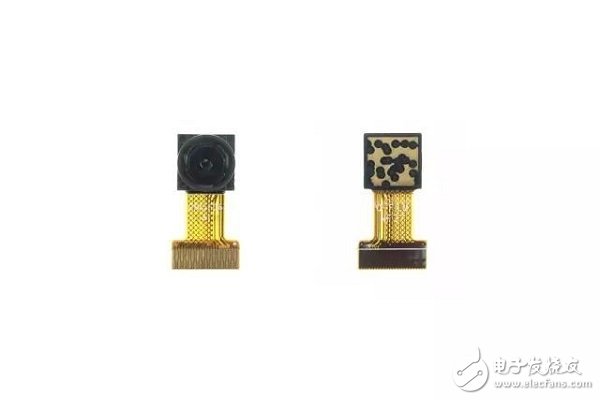
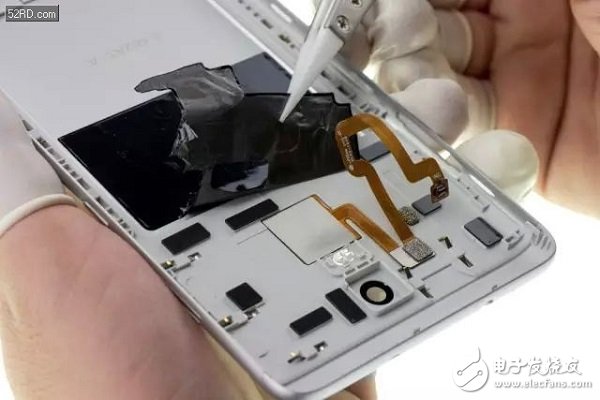
Step 4 Disassemble "post CAM"
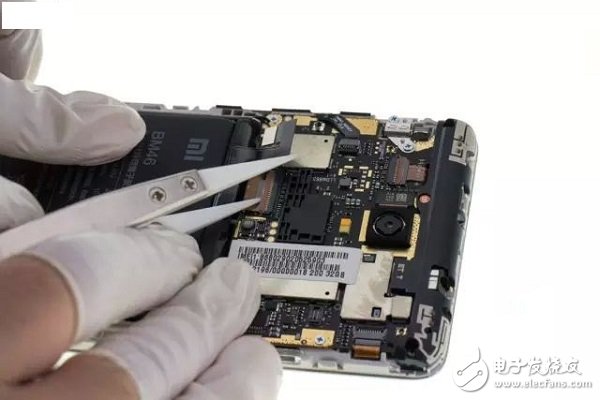
Disconnect the connectors on the motherboard before removing the Rear CAM (rear camera).
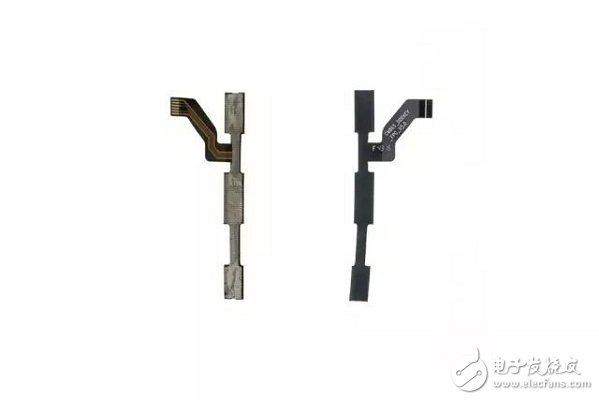
There are two types of connectors on the Red Rice Note 3 motherboard: BTB (Board to Board) and ZIP (Compressed Connector)
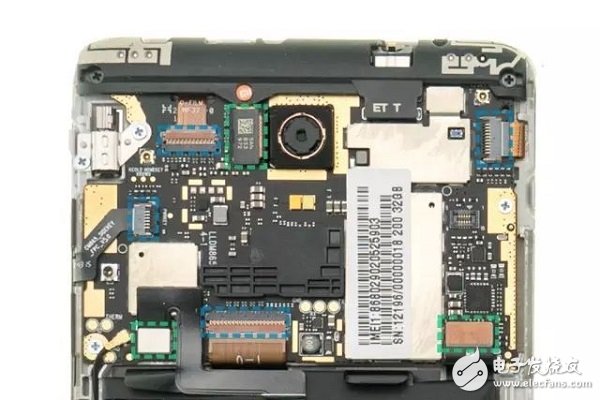
In the figure, the blue dotted frame is labeled as ZIP, and the green dotted frame is labeled as BTB.
In the order from left to right and top to bottom, these connectors are:
· Blue: "front CAM" (front camera), "TP" (touch panel), "side button ZIP", "screen ZIP"
· Green: "Back CAM" (rear camera), "Battery BTB", "Main FPC"
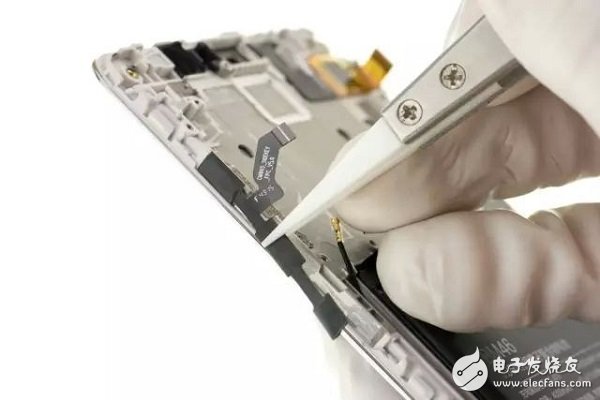
Disconnect the "RF antenna" (radio frequency antenna).

Disconnect the BTB of the "post CAM".
The apron on the "post CAM" cannot be removed separately until it is completely removed.
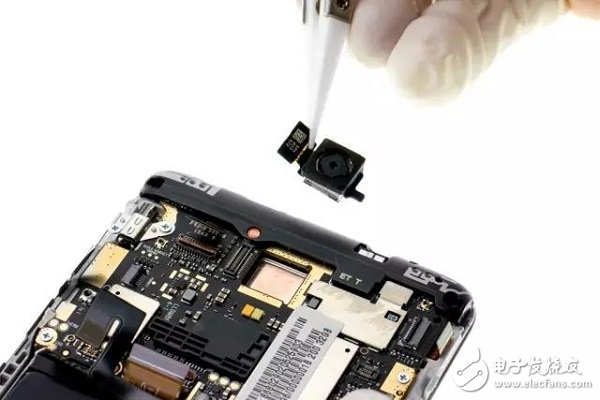
Remove the "post CAM".
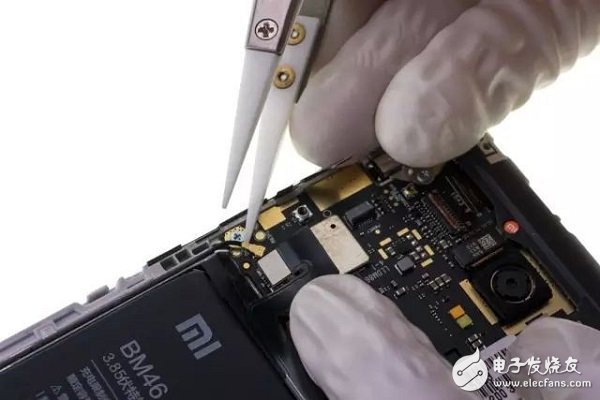
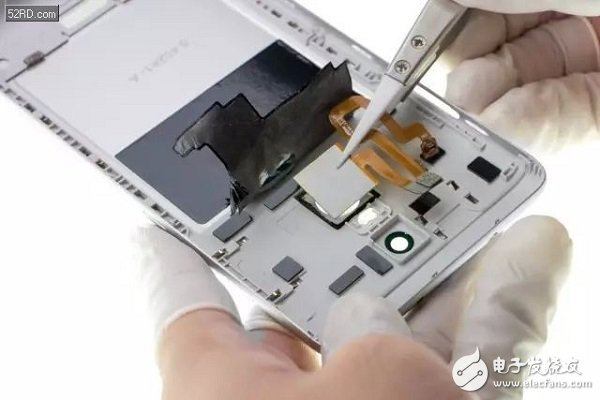
Step 5 Disassemble "Pre-CAM"
Remove the screws from the antenna bracket.
There are two kinds of 12 screws in the interior of Red Rice Note 3: black screws are used in the antenna bracket and "horn BOX", and silver screws are used on the main board.
Remove the antenna bracket.
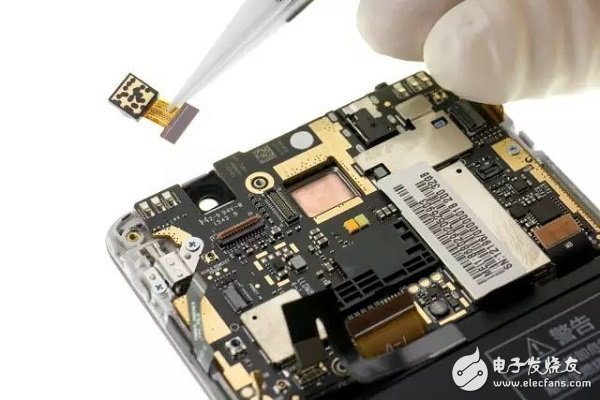
Remove the "front CAM" (front camera).
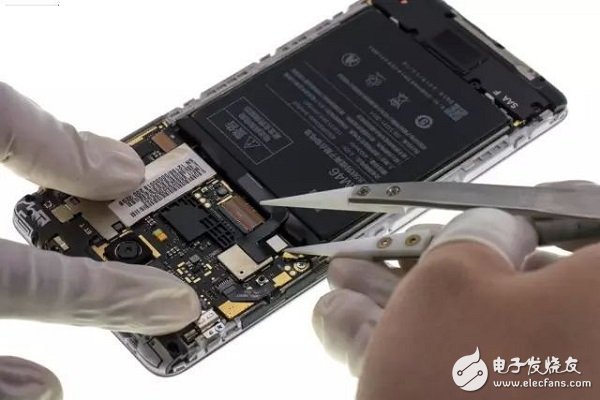
Step 6 Remove the motherboard
Remove the screws from the motherboard.
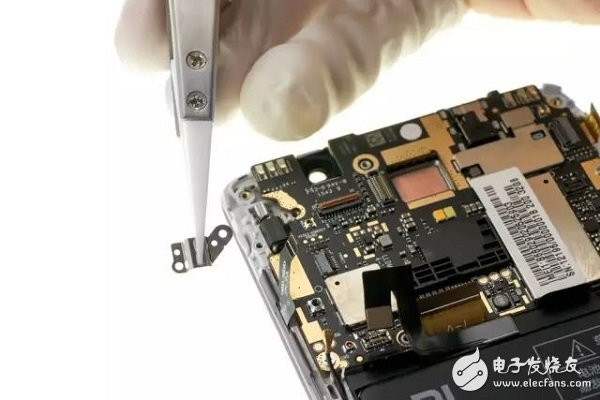
Remove the fixed steel piece from the vibration motor.
Lift the motherboard with the heat-dissipating copper foil under the “post CAMâ€.
Remove the motherboard.
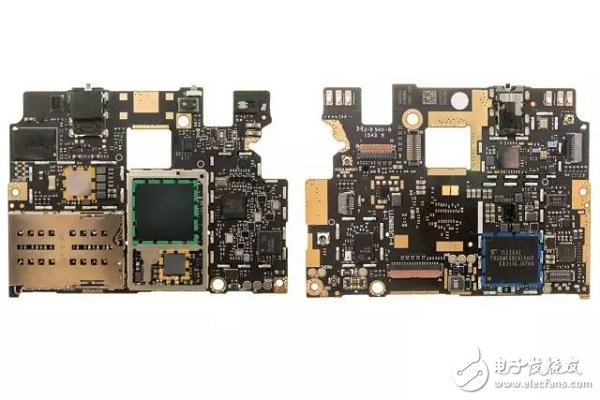
· Green SOC RAM: MTK Helio X10 Samsung 3 GB LPDDR3
·Yellow POWER: MTK 6331P MTK 6332P
· Blue ROM: Toshiba 32 GB eMMC 5.0
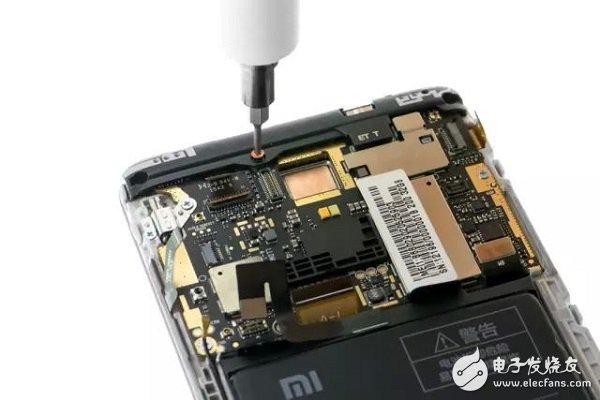
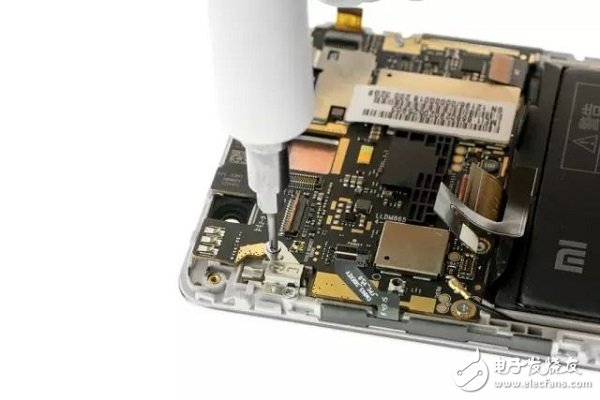
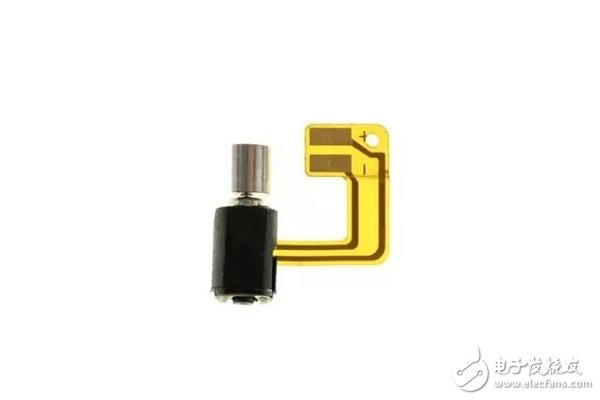
Step 7 Disassemble the vibration motor, "side button FPC", earpiece
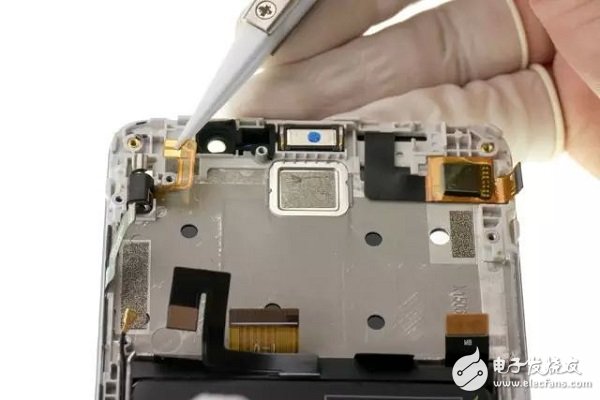
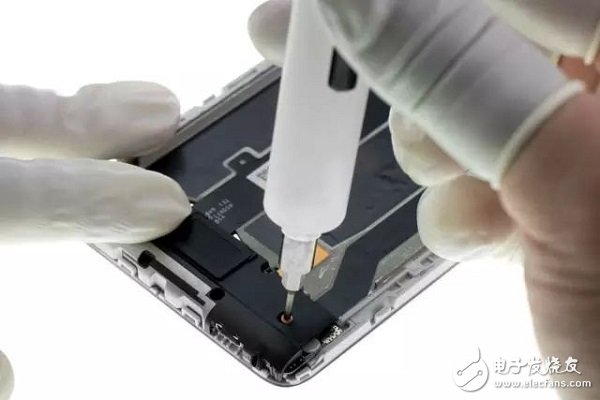
After heating from the side of the screen, the vibration motor is removed.
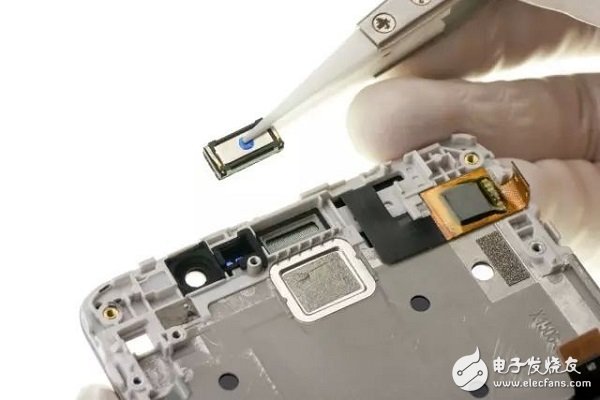
Remove the handset.
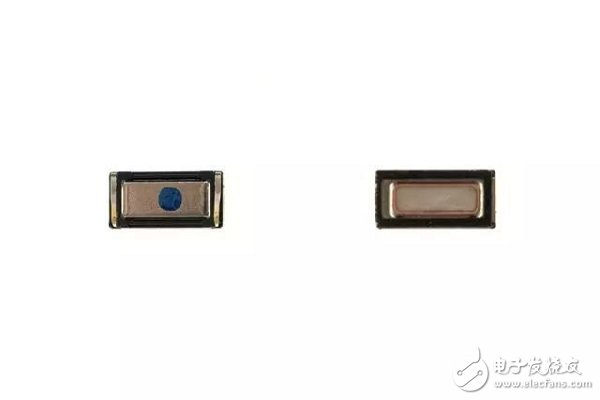
The earpiece is fixed with double-sided foam rubber, which is difficult to recover after disassembly.
Uncover the "side button FPC".
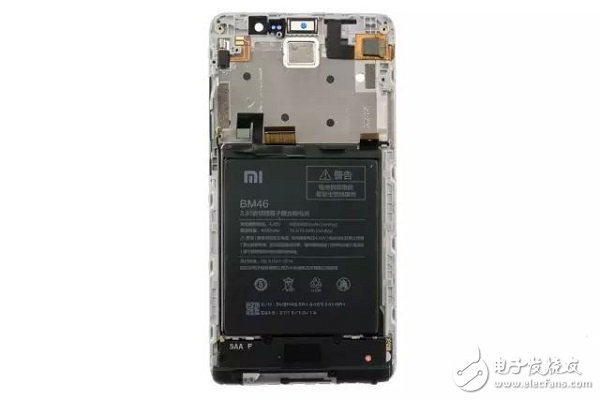
Step 8 Disassemble the battery
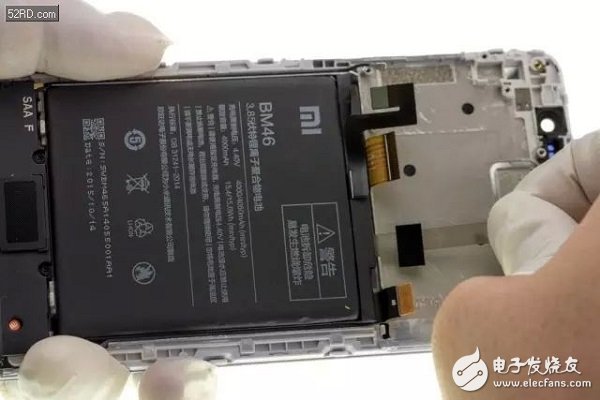
Pull off the pull-tab glue on the back of the battery.
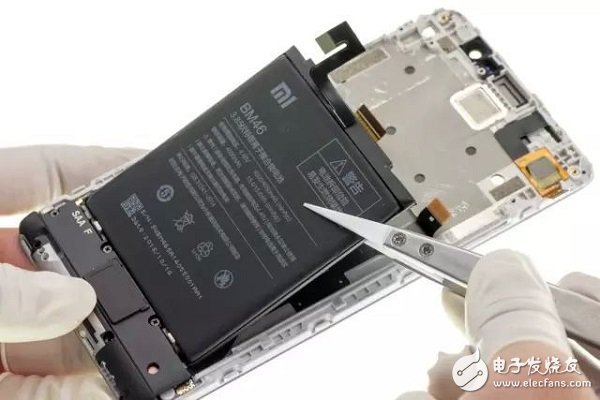
Remove the battery.
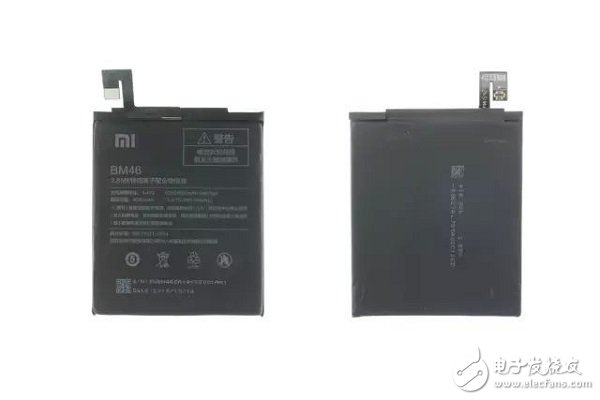
Red Rice Note 3 uses a 4000mAh battery, and its power adapter has an output specification of 5V/2000mA.
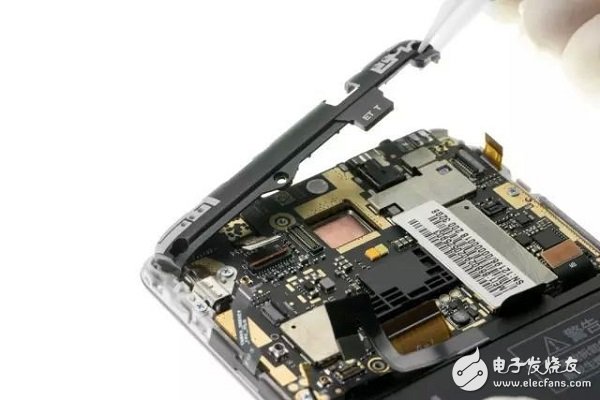
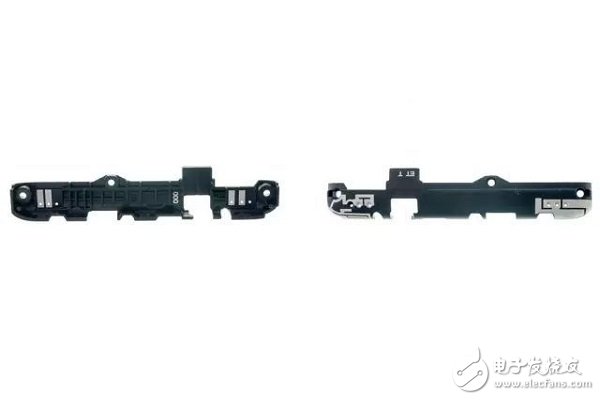
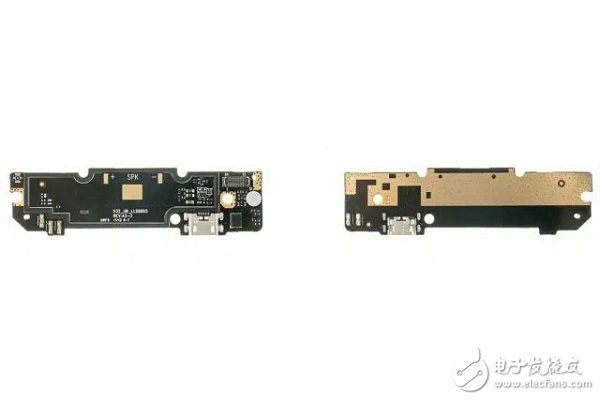
Step 9 Disassemble the "horn BOX" and the sub board
Remove the screw from the "Blanet BOX".
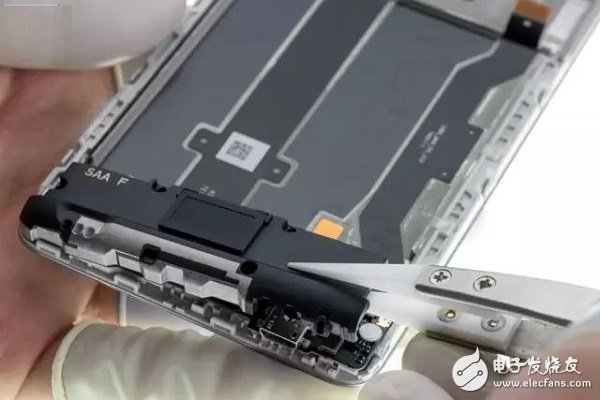
Take off the "Trumpet BOX".

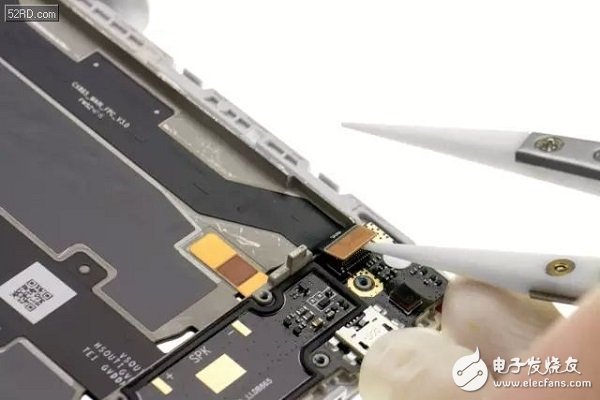
Disconnect the BTB of the "Main FPC".
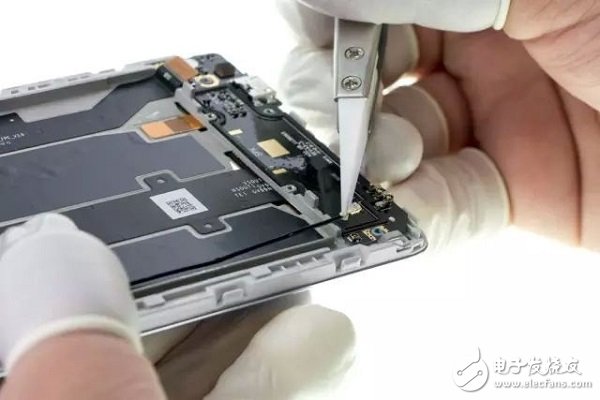
Remove the "RF antenna".
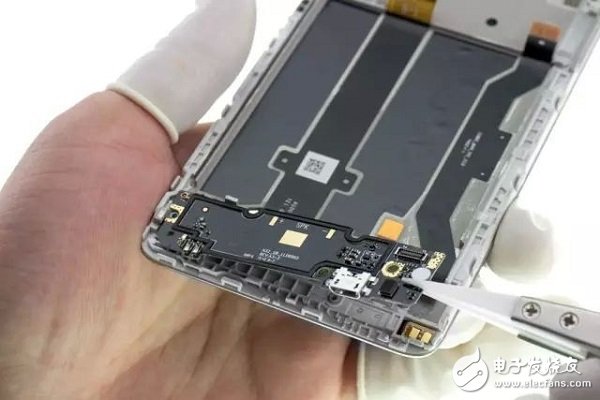
Remove the sub board.
Step 10 Removing the fingerprint identification module
The back cover of the Red Rice Note 3 has a plastic support under the metal.
After a little heating, the graphite heat sink patch is lifted to expose the fingerprint recognition module.
Remove the fingerprint identification module.
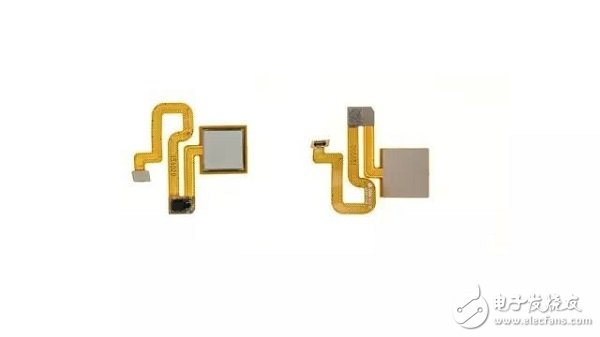
The fingerprint recognition module of Red Rice Note 3 is fixed on the back cover with double-sided foam rubber.

CS-211S: 1+1 pockets Coin Counter and sorter,
CS-311S: 2+1 pockets Coin Sorter
CS-610S+PRO: 6+1 pockets coin sorter
CS-910S+: 9+1 Pockets coin sorter
Those 4 models are all with alloy sensor for counterfeit detection
CS-600B: 6+1 pockets, mainly sort coins by diameter, no counterfeit detection
Coin Sorter,Coin Sorter With Detection,Coin Sorter For Euro,Currency Sorting Machine
Suzhou Ribao Technology Co. Ltd. , https://www.ribaoeurope.com